How to Take Care of and Clean Your Scuba Diving Equipment

Scuba regulators, BCDs, and exposure suits are not just dive equipment, they are components of a life-support system designed to keep you comfortable and confident while you explore the world down under. As such, it's critical that this equipment is well taken care of.
Proper scuba gear maintenance begins at home. The good news is, it's not that difficult, and it doesn't take that much time. By following a pre-dive and post-dive maintenance program, and by adhering to the manufacturer's service recommendations, you can increase the safety and enjoyment of those hours spent at depth, and at the same time extend the life of your dive gear. Here's how:
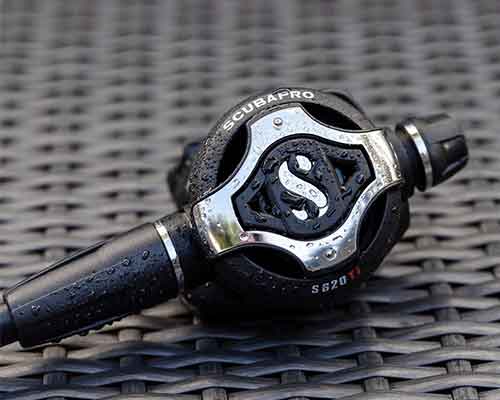
Gear Maintenance for Regulators: A Little Extra Effort Keeps You Breathing Easy
Your regulator is the most important gear item in your scuba inventory. So you want to make sure it is in top operating condition. Before heading out for a day of diving you always want to give your regulator a close inspection.
Follow these Steps to Inspect Your Regulator Before Your Dive:
Step 1: Remove the regulator's first stage dust cap and check that the filter is clean and free of corrosion.
Step 2: Next, attach the first stage to a tank and, before turning the air on, exhale through the second stage. This will blow out any dust that might have drifted inside.
Step 3: Once that's done, gently try to inhale.
Step 4: If you can't get a breath, that means the exhaust valve and main diaphragm are intact. If you can get a breath, that means air is leaking in from somewhere, which means water can leak in too, indicating that it's time for a service.
Step 5: Now turn the air on and check your primary and backup second stages. Both should breathe easily. Listen for leaks around the hose fittings where they screw into the first stage, which could indicate either a bad O-ring or, preferably, just a loose hose. Also, listen for leaks around the mouthpiece, another signal it's time for a service.
After Your Dive:
- Ensure that the high pressure inlet of the first stage regulator is closed with the special protective cap.
- Check that the anti-set anti-engraving device, available on the R195 and G260 second stages is not engaged.
- Should water accidentally enter the low pressure hose, connect the regulator to the cylinder, open the valve and press the second stage purge button down until all water has been expelled.
- Dry your regulator completely in a dry ventilated place, away from heat and direct sunlight.
- This is a good time to inspect the hoses and mouthpiece, as well as the O-ring on your tank valve, for signs of wear.
- Towel everything off and store your regulator in a dry location with hoses loosely coiled. Avoid hanging the regulator because this can stress the hose fittings.
While pre-dive and post-dive maintenance go far in maintaining the performance of a regulator, on occasion the system will need to be taken to an Authorized SCUBAPRO Dealer for service. A complete breakdown of a regulator system requires special tools and special skills, and only a trained scuba regulator service technician can competently provide that.
SCUBAPRO recommends its regulators be serviced by a trained technician every 24 months. For divers who make over 100 dives a year, SCUBAPRO recommends an inspection every six months and an overhaul every year. By following this pre- and post-dive maintenance regimen, and by adhering to the recommended service schedule, your regulator could last you virtually forever.
Gear Maintenance for BCDs: The Cornerstone of Your Scuba Rig
Modern BCDs perform a bevy of critical tasks: they hold the tank securely; deliver positive buoyancy at surface and neutral buoyancy at depth; organize and route breathing and console hoses; and provide a platform for your ballast system. It's a lot to ask of a single piece of equipment, which is why it's important you take care of it so it works right when you need it.
Before Your Dive
Step 1: Thoroughly examine your BCD for cuts, punctures, frayed seams, excessive abrasion, and loose or missing hardware.
Step 2: Check the remote exhaust valves and elbow ring on the pull dump valve to make sure all are properly tightened down.
Step 3: Inspect the power inflator for cracks or corrosion.
Step 4: Attach the low-pressure (LP) hose to your BCD's power inflator and check the inflate/deflate buttons for any signs of stickiness.
Step 5: While the LP hose is still attached, activate the power inflator and fill the air bladder until firm.
Step 6: Listen for leaks, then test the pull-dump and remote exhaust valves to make sure they're bleeding air and resealing properly.
Step 7: Finally, check the quick-release weight pockets to make sure their retention and release systems are fully functional.
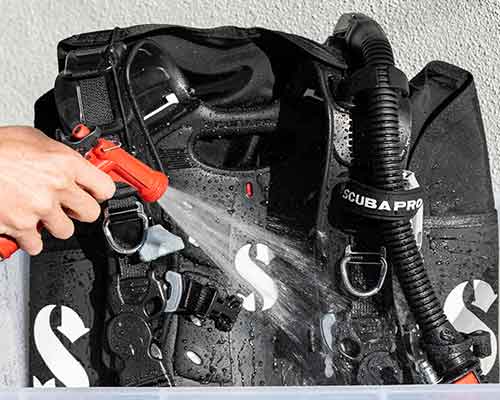
After Your Dive
Step 1: Break out the garden hose and give your BCD a good overall rinse to wash off any sand, salt, and/or dirt.
Step 2: Next, fill up a tub with fresh water, add a mild BCD cleaner, toss in your BCD, slosh it around, and give it a short soak followed by another slosh. Then pull it out of the tub and give it another good rinse with fresh water.
Step 3: The first two steps take care of the outside of the BCD. Now you have to get to the inside of the air cell where salt crystals gather and bacteria grows. Direct a gentle stream of hose water into the oral orifice on the power inflator while depressing the deflate button. This will allow water to fill the air cell while flushing out the power inflator mechanism. Put enough water in to allow you to slosh it around by rotating the BCD a few times.
Step 4: Next, drain the water via the remote exhaust valves. This will keep the now-dirty water from flowing back through the power inflator, and will also flush the innards of the exhaust valves which can get sticky if not cleaned regularly.
Step 5: With the cleaning portion completed, turn your attention to fittings and hardware. Inspect the body of the BCD for signs of abrasion, check the corrugated hose for cracks, and inspect the zip tie that holds the power inflator on the corrugated hose. Make sure all valves are screwed down snug. When completed, inflate the air cell and listen for leaks, then pull the exhaust valve pull cords to make sure all are operational.
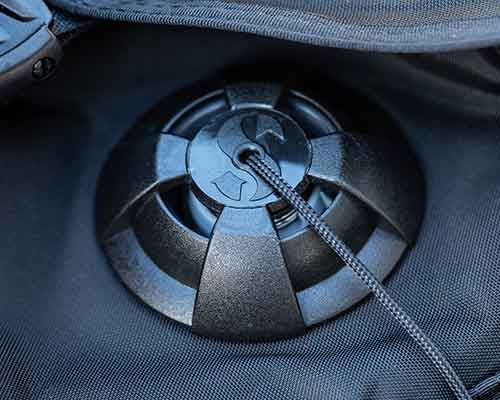
Step 6 (optional): Many divers use inflator/regs like SCUBAPRO's AIR2 on their BCDs. These popular units do double-duty as an alternate air source that takes the place of an octo reg as well as the BCD's power inflator. As it's part of your air-delivery system, it should be maintained just like you would your primary regulator. This includes giving it a good rinse and soak after each dive. And the quick-disconnect low-pressure hose fitting should also be cleaned after each dive to make sure it does in fact quickly disconnect when needed.
An inflator/reg should be professionally serviced at regular intervals. The importance of this service for the regulator portion of the assembly is obvious. Not so obvious are the benefits for the power inflator portion. If not periodically serviced, the internal valve that controls airflow to the BCD can get corroded. This can cause the valve to stick in the open position, allowing uncontrolled airflow to fill the BCD, which could cause a rapid ascent and, potentially, could necessitate a trip to the hyperbaric chamber.
Step 7: Finally, take a close look at the integrated weight-ditch system. The weight pockets should be removed and cleaned to make sure the quick-release buckles are not clogged with sand or sediment. Check that the weight pouches not only release properly but also lock into place without slipping out.
Once the BCD has been cleaned, inspected, and dried, slightly grease (with SCUBAPRO Lubricant Grease) the AIR2 and BPI couplings, partially fill the BCD with air to smooth out the wrinkles, then hang it in a cool place out of direct sunlight. SCUBAPRO recommends that BCDs be inspected and serviced by an Authorized SCUBAPRO Dealer at least once a year.
Gear Maintenance for Wetsuits: Keeping You Warm and Comfortable During Your Dive
Wetsuit Maintenance
Taking care of a wetsuit is a pretty simple process.
Before Your Dive
Step 1: Before a dive, a close inspection will reveal any frays or tears. Pay particular attention to the seams, especially in high-stress areas, for loose or broken stitches, or on the inside where any glued areas have pulled apart.
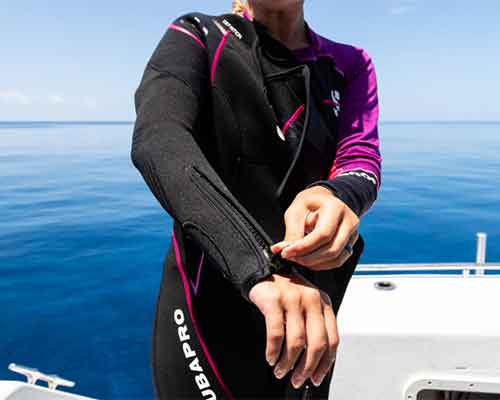
Step 2: If your wetsuit has wrist or ankle seals, check for dried out or cracked latex or smooth-skin neoprene that could allow unwanted water to seep into the suit.
Step 3: Check exercise the zippers to ensure they are all in good working order.
After Your Dive
Step 1: After the dive, thoroughly rinse the inside and outside of the wetsuit with clean, fresh water, paying particular attention to the zippers.
Step 2 (optional): While probably not necessary after every day of diving, an occasional tub soak with fresh water and a wetsuit cleaner/shampoo will help combat odors, wash away any accumulated body oils, and help eliminate salt and corrosion from zippers.
Step 3: After a thorough rinse, hang your wetsuit on a sturdy hanger and let it drip-dry out of direct sunlight in a place with decent air circulation. This is a good time to inspect the suit's zippers, seals and seams for damage.
Step 4: Once dry, both inside and out, lubricate the zippers (if recommended) and store the wetsuit in a cool, dry place, out of direct sunlight.
Drysuit Maintenance
Maintaining a drysuit is a bit more complex than a wetsuit because there are additional components that need to be tended to, like valves and heavy-duty waterproof zippers.
Before Your Dive
Step 1: Before heading out on a dive, inspect your drysuit for abrasion and tears, especially in the high-wear areas like knees, seat, and shoulders, and check seams for any fraying.
Step 2: Closely examine the waterproof zipper for bent or missing teeth. Treat the zipper with the manufacturer's recommended zipper wax and zip it to make sure the slider travels smoothly and is able to close completely.
Step 3: Check the neck and wrist seals for cracks or signs of splitting. This is especially critical with latex seals.
Step 4: Finally, put the drysuit on, zip up, make sure all seals have good contact with your skin, then connect the LP hose to the inflator valve and activate the button to make sure it doesn't stick. Inflate the suit, check the seals for obvious signs of leakage and exercise the exhaust valve to make sure it bleeds air and reseals as needed.
After Your Dive
Step 1: Rinse the outside of the drysuit, flush the valves, and wipe down the seals with fresh water.
Step 2: If the suit is wet inside, wipe down the interior with a damp towel and fresh water and turn it inside-out to dry.
Step 3: Inspect the seals for damage, then lightly dust them with non-perfumed talc.
Step 4: Clean the waterproof zipper with a toothbrush to eliminate any salt, sand, or corrosion and follow it up with a light coat of the recommended zipper wax .
Step 5: Give the suit another overall examination. If any new damage is found that requires patching, re-stitching, or the replacement of seals or a zipper, take it to an Authorized SCUBAPRO Dealer for repair. If all looks okay, hang the drysuit upside down by its feet with the zipper open and store it in a cool dry location out of direct sunlight.
Start Making Plans for Your Next Dive Trip
While a consistent equipment maintenance regimen is crucial, the best thing you can do for your regulator, your BCD, and your exposure suit is to use them. Dive gear that spends long, lonely months in a closet suffers from dust and cobwebs, soft parts dry out, and knobs and levers start to freeze in place. Your dive gear is made to get wet, so gear up and hit the water-the underwater world awaits.


